 Q Labs MSP Automation
This knowledge base article provides step-by-step instructions on setting up an integration between N8N and Autotask PSA. You’ll learn how to create API credentials in Autotask, test them using PowerShell, and implement common automation workflows in N8N.
Creating API Credentials in Autotask
To access the Autotask PSA API, you’ll need to create API credentials:
- Log into Autotask as a user with Administrator permissions
- Navigate to Admin > Resources (Users)
- Click the pulldown on the New button and select New API User

- Fill in the required fields in the form:
- First Name and Last Name: You can use your organization name or “API Integration”
- Email Address: Enter a valid email address
- Security Level: Select the appropriate security level
- Primary Internal Location: Select your organization’s location
- In the Credentials section:
- Click Generate Key to create the username (API key)
- Click Generate Secret to create the password (secret)
- In the API Tracking Identifier section:
- Select Custom (Internal Integration)
- Enter an Internal Integration Name (a descriptive name for your integration)
- Note the automatically generated Tracking Identifier
- In the Line of Business section:
- Select which lines of business this API can interact with (select all if needed)

- Note down the following credentials in a secure location:
- Username (Key)
- Password (Secret)
- API Tracking Identifier
- Click Save & Close
Testing API Credentials with PowerShell
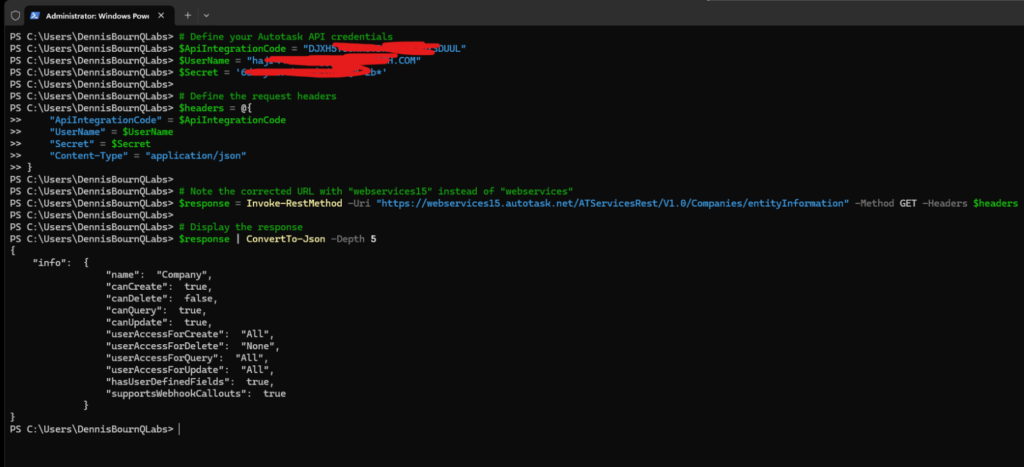
Before configuring N8N, it’s a good practice to test your API credentials using PowerShell:
# Define your Autotask API credentials
$ApiIntegrationCode = “YOUR_API_INTEGRATION_CODE”
$UserName = “YOUR_USERNAME”
$Secret = ‘YOUR_SECRET’ # Use single quotes for secrets with special characters
# Define the request headers
$headers = @{
“ApiIntegrationCode” = $ApiIntegrationCode
“UserName” = $UserName
“Secret” = $Secret
“Content-Type” = “application/json”
}
# Important: Find your correct Autotask URL
# Your URL might be webservices15.autotask.net or another subdomain based on your region
$response = Invoke-RestMethod -Uri “https://webservices15.autotask.net/ATServicesRest/V1.0/Companies/entityInformation” -Method GET -Headers $headers
# Display the response
$response | ConvertTo-Json -Depth 5
Note: If you receive a 401 Unauthorized error, verify you’re using the correct Autotask URL for your instance. Each Autotask customer is assigned to a specific zone (e.g., webservices15.autotask.net). You can discover your correct URL here. Using Swagger UI to explore REST API requests
Setting Up Credentials in N8N
Now, let’s set up these credentials in N8N:
- Open your N8N instance and find Add Credential (its in about 4 different spots)
- Select Generic Credential Type
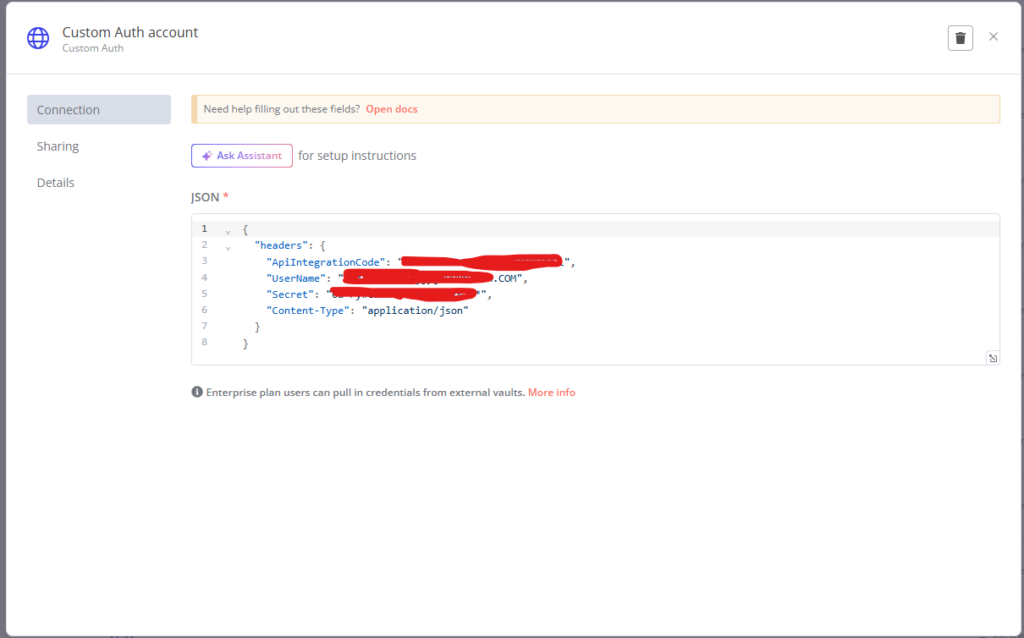
- For Generic Auth Type, select Custom Auth
- For JSON, enter the following structure (replace with your actual values):
{
“headers”: {
“ApiIntegrationCode”: “YOUR_API_INTEGRATION_CODE”,
“UserName”: “YOUR_USERNAME”,
“Secret”: “YOUR_SECRET”,
“Content-Type”: “application/json”
}
}
This custom auth configuration creates the necessary headers that Autotask requires for authentication.
Implementing Common Workflows
Checking if a Contact Exists
To check if a contact already exists in Autotask:
- Create a new workflow in N8N
- Add a Function node to prepare the contact email query:
- Name it “Prepare Contact Query”
- Use the following code:
// Extract user data from webhook or previous node
const firstName = $input.item.json.UserFirstName || “”;
const lastName = $input.item.json.UserLastName || “”;
// Create the email (first initial + lastname@domain.com)
const emailPrefix = firstName.charAt(0).toLowerCase() + lastName.toLowerCase();
const contactEmail = `${emailPrefix}@riverbirchrenewables.com`;
return {
json: {
contactEmail
}
};
- Add an HTTP Request node:
- Name it “Check Existing Contact”
- Method: POST
- URL: https://webservices.autotask.net/ATServicesRest/V1.0/Contacts/query
- Authentication: Select your Autotask API credentials
- Body:
{
“filter”: [
{
“op”: “eq”,
“field”: “emailAddress”,
“value”: “{{$json.contactEmail}}”
}
],
“includeFields”: [“id”, “firstName”, “lastName”, “emailAddress”]
}
- Add a Function node to count contacts:
- Name it “Count AT Contacts”
- Use the following code:
const items = $input.item.json.items || [];
return {
json: {
ATContactsFound: items.length,
firstContactId: items.length > 0 ? items[0].id : null
}
};
Creating a New Contact
To create a new contact when one doesn’t exist:
- Add an IF node after the “Count AT Contacts” node:
- Condition: {{$json.ATContactsFound}} Equal to 0
- In the “IF” branch (contact doesn’t exist), add an HTTP Request node:
- Name it “Create Contact”
- Method: POST
- URL: https://webservices15.autotask.net/ATServicesRest/V1.0/Companies/283/Contacts (use your specific Autotask zone URL and company ID)
- Authentication: Select your Custom Auth credentials
- Generic Credential Type: Custom Auth
- Custom Auth: Select your Autotask credentials created earlier
- Body:
{
“firstName”: “{{$(‘Prepare Contact Query’).item.json.firstName}}”,
“lastName”: “{{$(‘Prepare Contact Query’).item.json.lastName}}”,
“emailAddress”: “{{$(‘Prepare Contact Query’).item.json.contactEmail}}”,
“isActive”: true,
“mobilePhone”: “{{$input.item.json.cellPhone}}”
}
Updating Contact UDFs
After creating or finding a contact, you might need to update User Defined Fields (UDFs):
- Add an HTTP Request node after both branches of the IF node:
- Name it “Update Contact UDFs”
- Method: PATCH
- URL for dynamic contact ID: https://webservices15.autotask.net/ATServicesRest/V1.0/Companies/283/Contacts/{{$(‘Count AT Contacts’).item.json.ATContactsFound > 0 ? $(‘Check Existing Contact’).item.json.items[0].id : $json.itemId}} (use your specific Autotask zone URL and company ID)
- Authentication: Select your Custom Auth credentials
- Generic Credential Type: Custom Auth
- Custom Auth: Select your Autotask credentials created earlier
- Body:
{
“userDefinedFields”: [
{
“name”: “Custom Field Name”,
“value”: “Custom Field Value”
}
]
}
Adding Billing Products to Contacts
To add billing products to a contact, first create a function to determine which products to add:
- Add a Function node:
- Name it “Determine Billing Items”
- Use the following code:
// Get the request type from the webhook data
const requestType = $(‘Webhook’).first().json.body.Ticket.Questions[0].Value;
// Initialize array to hold billing product IDs
let billingProductIDs = [];
// Determine which billing items to apply based on request type
if (requestType === “Server Access”) {
// Server Access gets these products
billingProductIDs = [
29682890, // bt_Manage
29682908, // Saas Backup for Office 365
29682995, // User Portal
29683028 // MS365BusPrem (NCE)
];
} else if (requestType === “Email Only”) {
// Email Only gets these products
billingProductIDs = [
29682908, // Saas Backup for Office 365
29682909, // ExchOnlineP1
29682995 // User Portal
];
}
// Get the contact ID (either existing or newly created)
const contactID = $(‘Count AT Contacts’).item.json.ATContactsFound > 0
? $(‘Check Existing Contact’).item.json.items[0].id
: $json.itemId;
// Get the current date for effectiveDate
const effectiveDate = new Date().toISOString();
// Create an array of items for N8N to loop through
if (billingProductIDs.length > 0) {
return billingProductIDs.map(productID => {
return {
json: {
billingProductID: productID,
contactID: contactID,
effectiveDate: effectiveDate
}
};
});
} else {
// Return empty array or a single item indicating no products
return [{
json: {
noProductsToAdd: true,
contactID: contactID
}
}];
}
- Add an HTTP Request node:
- Name it “Add Billing Product”
- Enable “Run for each item” option
- Method: POST
- URL: https://webservices15.autotask.net/ATServicesRest/V1.0/Contacts/{{$json.contactID}}/BillingProductAssociations (use your specific Autotask zone URL)
- Authentication: Select your Custom Auth credentials
- Generic Credential Type: Custom Auth
- Custom Auth: Select your Autotask credentials created earlier
- Body:
{
“billingProductID”: {{$json.billingProductID}},
“contactID”: {{$json.contactID}},
“effectiveDate”: “{{$json.effectiveDate}}”
}
- Add a Merge node after the HTTP Request:
- Name it “Merge Billing Results”
- Mode: “Merge By Index”
Handling API Limitations
Autotask API has some limitations to be aware of:
- Thread Threshold: Maximum of 3 concurrent API requests
- Rate Limiting: Excessive requests might be throttled
To handle these limitations:
- Use the “Run for each item” option with a Merge node instead of sending all requests simultaneously
- Consider adding Wait nodes between requests if you still encounter rate limiting issues
- Implement proper error handling to catch and retry failed requests
Troubleshooting
Common issues and solutions:
- Authentication Errors (401)
- Verify your API credentials are correct
- Check if the API user has the necessary permissions
- Too Many Requests Error
- Add delays between requests
- Reduce the number of concurrent requests
- Invalid Request Format (400)
- Ensure your JSON body matches the expected format
- Check field names and data types
- Node Reference Errors
- Verify all node names in expressions match actual node names
- Check for missing connections between nodes
For additional assistance, consult the Autotask API Documentation.
By following this guide, you should now have a functioning integration between N8N and Autotask PSA, allowing you to automate contact management and billing product associations.