 Q Labs MSP Automation
Need to Azure Join multiple machines? Lets use your RMM to get it done.
What you will need:
- A Windows Provisioning Package created with Windows Configuration Designer (WCD)
- A global admin account in the Azure tenant that you will be joining the endpoints to
- Some way to run the powershell code on each endpoint, I will be using DattoRMM here.
Creating your Provisioning Package
Run through the Provision desktop devices wizard in WCD. Skip directly to the Account Management section and select Enroll in Azure AD.
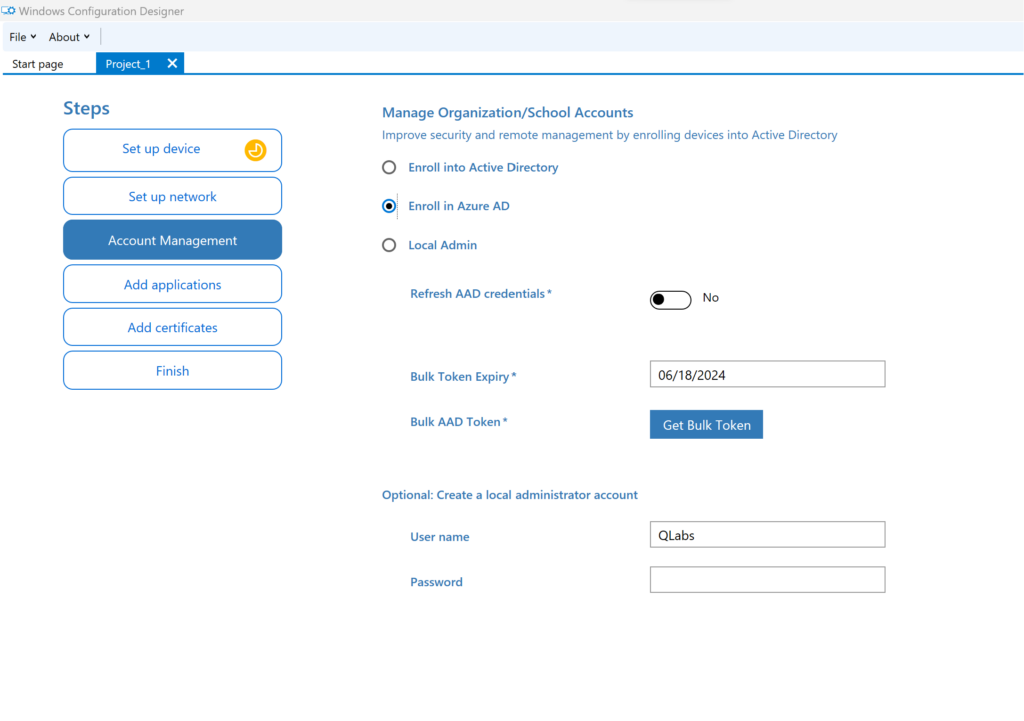
Click the Get Bulk Token button and authenticate to the desired Azure Tenant using an account that has high enough permissions to join a machine. Note the Bulk Token Expiry date, the provisioning package will stop working after that date and you will need to create a new package. It only takes a minute, so its not a big deal. I like to lower the date to just 15 or 30 days. WCD warns you that should the provisioning package file fall into the wrong hands, it could possibly be used to access information. Shorten the life of the token as low as you can to reduce risk.
WCD will not allow you to finish the package because you skipped the Set Up Device and Set Up Network sections. So click Switch to advanced editor in the lower left of the window.
In the right pane, expand Runtime Settings to see what is in the package. Some OOBE settings are inserted by default. You can delete them by highlighting OOBE and selecting Remove from the top of the list.
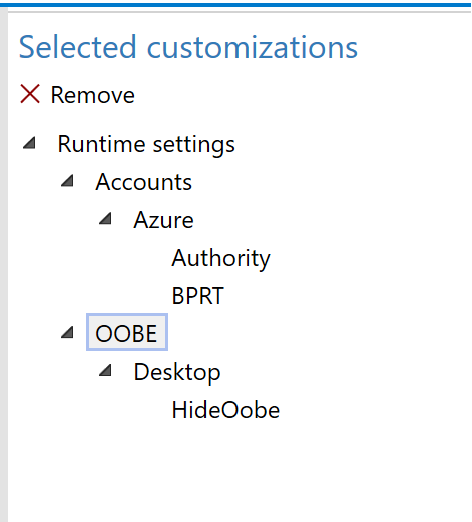
This should leave you with just the Azure -> Authority and Azure -> BPRT.
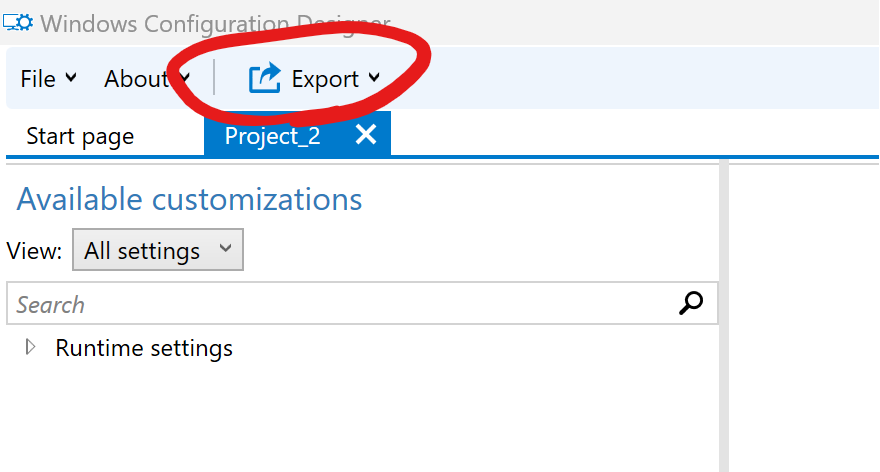
Click the Export button to export the PPKG file and save it to a safe location. It’s a good idea not to use spaces in the name, it will make it easier to reference the file in the component we build in the next section.
Creating a DattoRMM component
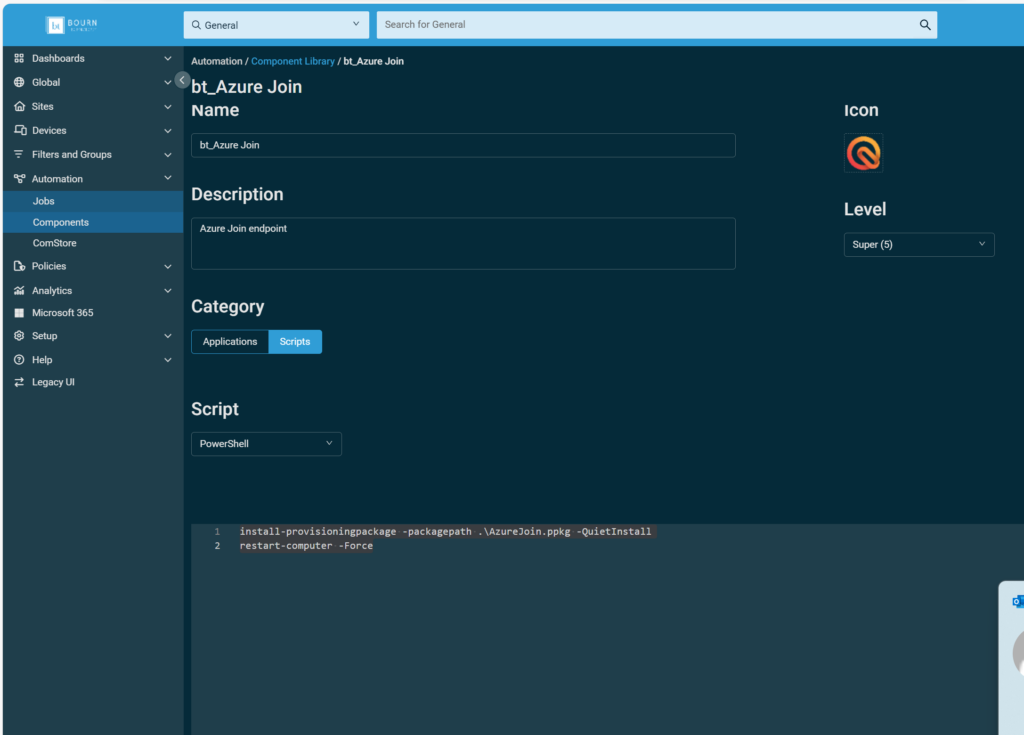
At its most basic level, all we need to do is apply the provisioning package and reboot the endpoint. We will use the powershell commands install-provisioningpackage and restart-computer to accomplish this. Start by creating a new Component, set the editor to Powershell and the category to Scripts. It is also a good idea to set the component to run only in the desired site to prevent accidentally running the component on devices not owned by the client.
In the Files section, attach the ppkg file you created earlier.
Now for the code.
install-provisioningpackage -packagepath .\AzureJoin.ppkg -QuietInstall
restart-computer -Force
This code installs the provisioning package from the current directory. Adjust the file name to match the name of your provisioning package.
Wrapping up
Thats it. Not as scary as you though it would be. Now a junior technician can Azure Join a machine without needing to know an Azure Global Admin password.
There is plenty of room for improvement in this component. Checking for success, ensuring that the endpoint is not Domain Joined already, etc.