 Q Labs MSP Automation
Building a Provisioning Package
Using a provisioning package can speed up your workstation deployments while increasing consistency and quality. Imagine all workstations deployed with no bloatware, your stack installed and ready to go, and any client requirements already installed. That is what we are building in our Workstation Deployment SOP. The first phase of that SOP is everything up to and including installing the RMM agent. This is one way to automate that process.
What can a Provisioning Package do?
A provisioning package can do a lot! We recommend keeping it simple though, as if the package fails, it can leave the endpoint in an unstable state requiring a reset. With that in mind, we can still do a lot.
- Add local admin account
- Rename computer
- Configure wireless network
- Remove OEM bloatware
- Remove Microsoft bloatware
- Join Local AD *stores credentials in WCD Project. We can do it in a more seucre way via RMM.
- Join Azure AD *requires a token that is created with an admin account, usually set to expire in 90 days.
- Install RMM
Install Windows Configuration Designer
To create a provisioning package, we will use WCD, which is available from the app store in Windows. The quickest installation is a simple winget command.
winget install "Windows Configuration Designer"*please note that by default, WCD stores projects in your “My Documents” folder. Projects may include credentials so be sure to keep them safe.
Creating a WCD Project
Depending on your need, you will likely be creating a WCD project per client. Each one including a different RMM installer so devices get added to the correct site in your RMM.
Remember not to get too ambitious with the provisioning package, they get temperamental and break easily.

Under the Create column, choose Provision desktop devices.
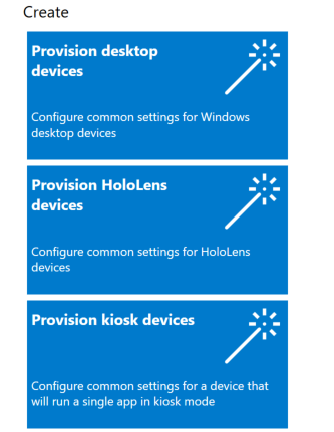
Enter a name and location for the project. We recommend naming the project with the site or customer name from your RMM. When the new project opens, you will see 6 steps on the right, some items must be filled in to continue.
Step 1 : Setup Device
It is required to set up a device name. You can use %RAND:X% and %SERIAL% in addition to AlphaNumeric characters to generate a unique name for each device. For this example, we will use a two letter code for the site name, followed by a dash then the serial number of the endpoint.
The slider named Remove pre-installed software is pretty cool, it will force a Windows Reset before continuing, which will remove all the OEM Bloatware from the machine.

In Set up network, we can add a wireless network if required. If you expect to use wired a wired network you can turn this off to skip this step.

In Account Management, we can add a local account, join local AD, or enroll the device in AzureAD. For this example, we are just creating a local account. Joining Local AD is handled by RMM in Phase3. *note that the password entered here is stored in a state that can be extracted should the provisioning package fall into the wrong hands. In our process, this password is changed to a unique string in Phase2.

Skip Add Applications and Add Certificates for now. We will add our RMM installer using the advanced editor. To get to the advanced editor, look for “Switch to advanced editor” in the lower left corner. Once selected, you will receive a message stating that you cant go back to the wizard. Click Yes to continue.
In the advanced editor, the screen is split into 3 columns. The left has the available customizations. Again dont get lost in the great options, some will cause the package to not apply leaving the endpoint in a state that requires another reload. Most of the options can be performed by RMM later anyway.
The Middle panel shows info on the currently selected customization. And the Right panel shows the customizations configured in this provisioning package. We will be working in ProvisioningCommands in the left panel.
We will be adding a couple CommandFiles and a single CommandLine command. This approach is detailed in this Microsoft Learn page.
The CommandLine will run a bat file, which we will call the orchestrator. The orchestrator batch file will create a log file, Copy the agent installer to the C drive (in the event the provisioning package cant install RMM, it will be there waiting for us to manually install), Attempt to run the RMM agent installer, Then attempt to run the installer a different way, and finally attempt to run the installer a third way. In testing this out for a couple weeks, I have seen the 1st way fail many times on 21H2, and ive seen the second way fail on 22H2. So we will try multiple times for a greater chance of success.
Building the files
RMM_<sitename>.ps1 This powershell file simply sets up logging to a file on the root of the C drive, then launches the installer, waits for 20 seconds then ends. Save the following code to a ps1 file named for the site. In this example, RMM_TESTSITE.ps1
$Logfile = "c:\qlabs_provisioning.log"
Function LogWrite
{
   Param ([string]$logstring)

   Add-content $Logfile -value $logstring
}
LogWrite "Running RMM Installer from PS Script"
start-process "c:\AgentSetup.exe" | Out-Null
LogWrite "Sleeping for 20 seconds"
start-sleep -seconds 20
LogWrite "Finished Powershell Script"
orchestrator.bat This batch file will try to install the RMM Agent 3 different ways. Save the following code to a bat file named orchestrator.bat
set LOGFILE=%SystemDrive%\qlabs_provisioning.log
echo Provisioning Package running as %USERNAME% >> %LOGFILE%
echo Listing files found in %CD% >> %LOGFILE%
dir >> %LOGFILE%
echo copying agent installer to c drive >> %LOGFILE%
copy AgentSetup.exe c:\AgentSetup.exe >> %LOGFILE%
echo Running installer from batch file. 1st attempt >> %LOGFILE%
c:\AgentSetup.exe
timeout /t 20 >> %LOGFILE%
echo Trying installer using PSEXEC. 2nd attempt >> %LOGFILE%
PsExec.exe -accepteula -i -s cmd.exe /c "c:\AgentSetup.exe" >> %LOGFILE%
timeout /t 20 >> %LOGFILE%
echo Trying to run installer using psexec and powershell. 3rd attempt >> %LOGFILE%
PsExec.exe -accepteula -i -s cmd.exe /c "powershell.exe -ExecutionPolicy Bypass -File '.\RMM_TESTSITE.ps1'" >> %LOGFILE%
echo result: %ERRORLEVEL% >> %LOGFILE%
echo Finished Installing agentsetup.exe >> %LOGFILE%
Download the RMM installer for the site you are building. Either name it AgentSetup.exe or change the bat and ps1 files to reference the name of your RMM installer.
Download a fresh copy of PSEXEC from Microsoft here. Extract the archive and pull out psexec.exe.
Add CommandFiles to the package
In the left pane of WCD, select ProvisioningCommands -> DeviceContext -> CommandFiles. For each of the 4 files, select Browse in the center pane, locate the files and select Add. If you expand your settings in the right pane, you will see them added to the package.

Then, select ProvisioningCommands -> DeviceContext -> CommandLine and enter the command to run your orchestrator.bat file.

Finally, save the project from File -> Save. Then select Export -> Provisioning Package.
If you will be running multiple provisioning packages, you can set a Rank here to enforce an order to run them, for this example we will just click Next a couple times to skip the options to name, sign, encrypt, and password protect the package. Finally click Build to generate the package. Once built, you will be presented with the location of where it saved the files. By default it is the project folder you chose when you created the project. You can click the blue text of the location to open explorer to the folder.

Select the file that is named for your project that is a type “RunTime Provisioning Tool” and copy that file to the root directory of a fresh thumb drive.

Testing the Provisioning Package
You can now test your package. To launch a package, reset a windows machine, and when you see the OOBE window, simply plug in the thumb drive and watch it get to work doing your job for you.

Immediately after inserting the thumb drive, it should start working, rebooting a couple times in the process. You can remove the thumb drive as soon as you see the following screen. It just takes a couple seconds.

If you tried to do too much, you may end up with a message letting you know it failed. In this case, the endpoint doesn’t have a wireless network card, so it couldn’t add the wifi network. You can Continue, Reset, or Try Again. Selecting Continue will put you through the OOBE options, creating another local account. The account created in your package is already there.

What else can we do with Provisioning Packages
Its still in testing, but if we control how a PC is reset, we can preload the provisioning package onto the device and have it configure itself as it comes up from a reset. Once this is figured out, we will be able to completely reset and configure a device remotely. That is both exciting and scary at the same time.